This is a short tutorial that shows how to install Odysseus and how to setup the first time. This tutorial is for persons who just want to use Odysseus for data stream management. For those, who want to develop with Odysseus (e.g. create new operators or extend functionalities), may have a look at Development with Odysseus, which introduces how to import Odysseus into Eclipse.
1. Prerequisite
First, Java11 must be installed
2. Download Odysseus
Go to Odysseus Website to the Download section. Choose your operating system. Download the archive. (Remark: 32 bit versions are not longer available.)
3. Unzip
Next, you have to unzip the archive. There is no installer nor a dedicated installation directory. Thus, you can choose a destination of your choice (In some cases, Odysseus does not behave correctly, if the installation path is to long. In this case try to install Odysseus to another location).
Remarks:
- If you want to use the update feature, do not install Odysseus in a shared folder.
- Under windows: Do not use folder "program files".
- Important: Do not use an existing directory, e.g. from an older Odysseus installation! If you want to update, see How to update Odysseus.
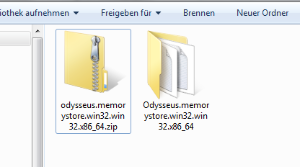
After unpacking, you may have something like the following:
4. Start Odysseus
Run "studio.exe" to start Odysseus.
Remark:
- As studio is an Eclipse based application you can raise the memory the same way:
- If an error occurs at start, try to execute
java -versionon a console to see if the right Java version is installed and reachable.
In studio.ini:
-startup
plugins/org.eclipse.equinox.launcher_1.3.100.v20150511-1540.jar
--launcher.library
plugins/org.eclipse.equinox.launcher.win32.win32.x86_64_1.1.300.v20150602-1417
-console
-clean
-nl
en
-data
@noDefault
-vmargs
-Xms1000M
-Xmx1000M
-Dsysredirect=true
-Declipse.p2.mirrors=false
-Declipse.log.level=ERROR
change Xms and Xmx to the needed values. Default is 1000M.
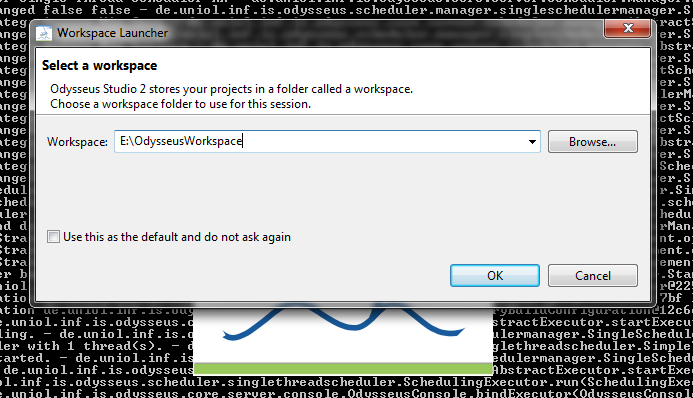
5. Choose Workspace
At the first start, you have to choose a workspace. This workspace is a directory where all Odysseus projects will be stored.You can also check the "Use this as the default.." option so that this dialog will not pop up at the next start of Odysseus.
6. Login
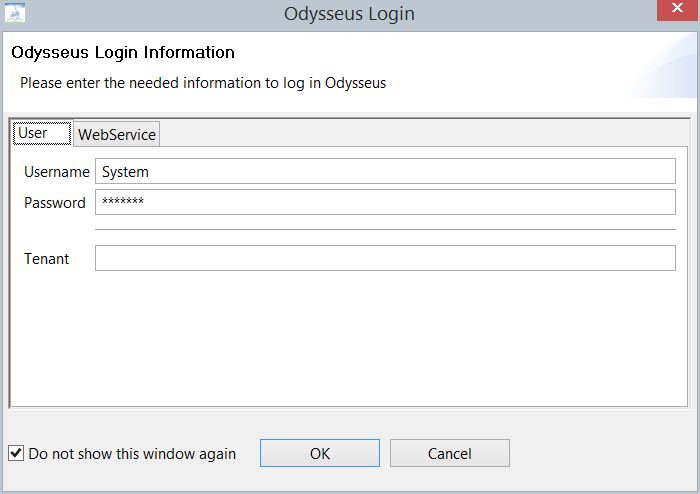
Next, Odysseus asks you for a user and a password. The default user is "System" with password "manager". You can also check "Login automatically" so that username and password is saved and used automatically at the next start so you don't have to type in your login data again. In some cases there may be a field "Tenant". For most cases this field should be empty.
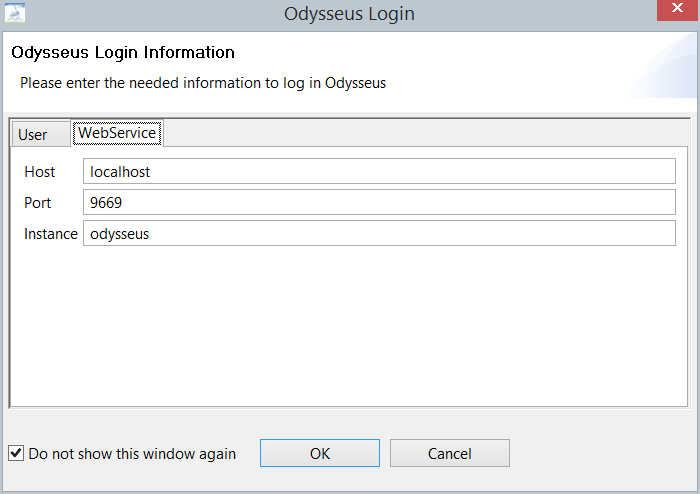
If you are using the client version of studio, the WebService tab must contain information about the Odysseus Server:
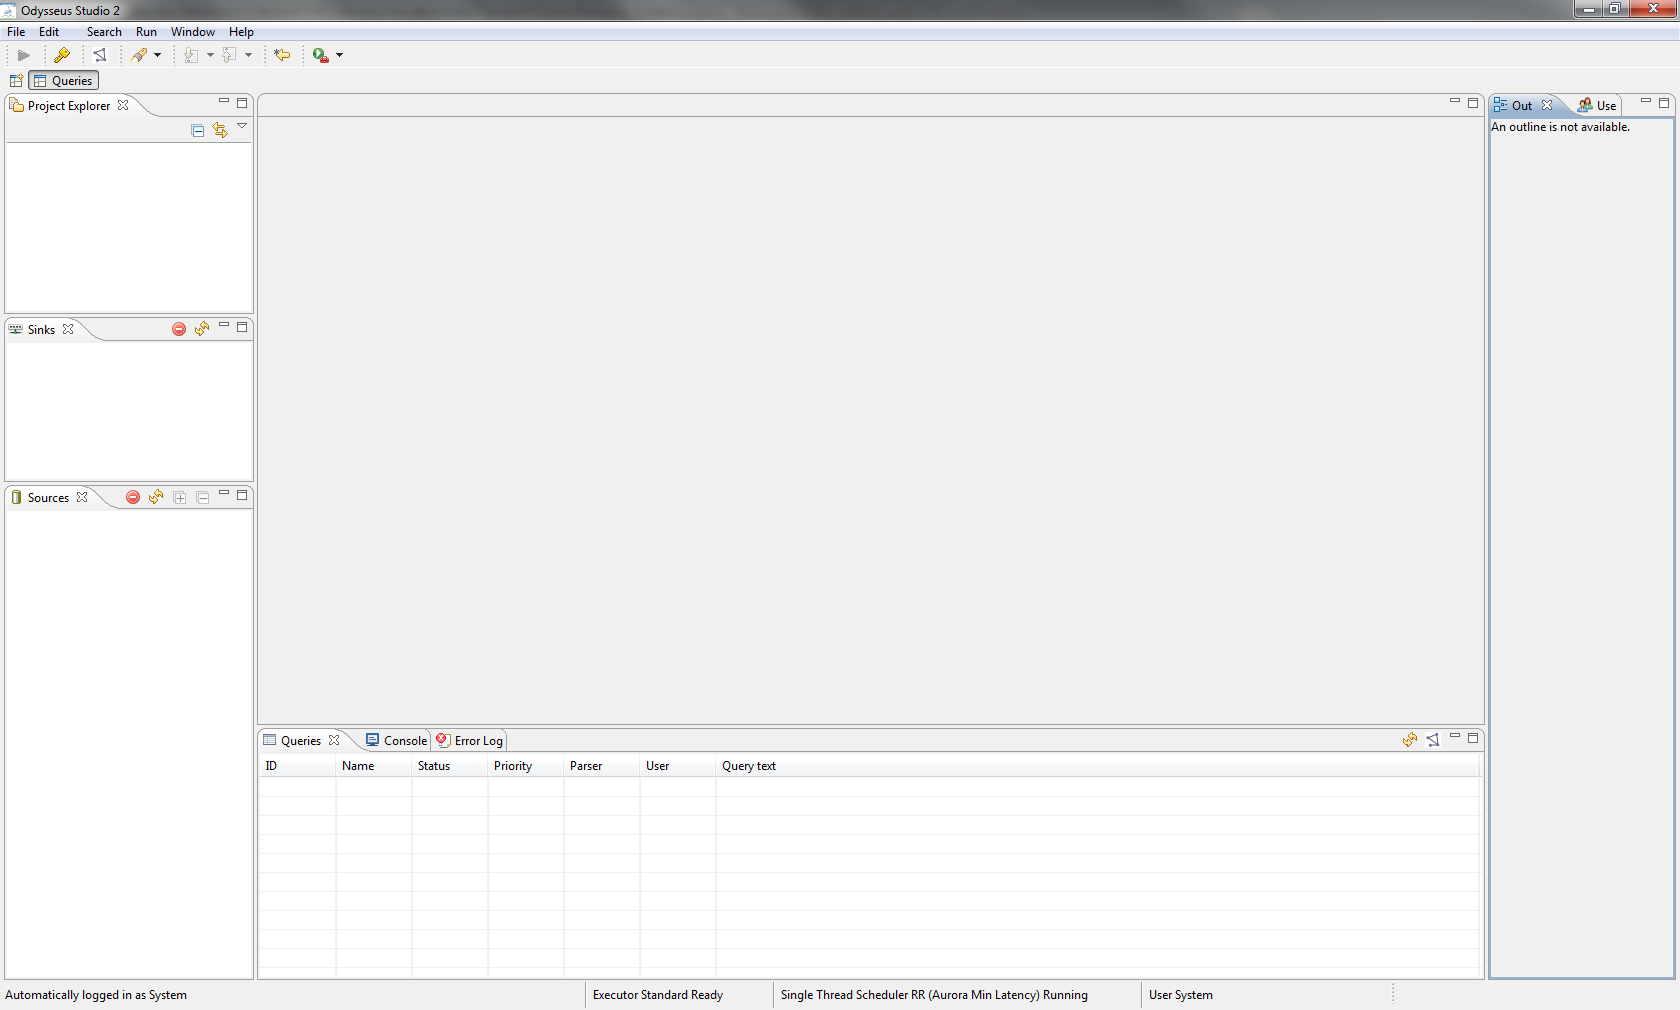
After that, Odysseus Studio starts, so you should the the interface:
That's all.
7. Next steps
You now can use Odysseus. Now, you can, for example, make yourself familiar with Odysseus Studio or you may create or import projects. For further steps, you may have a look at these pages:
- Odysseus Studio introduces the interface, views and commands
- Run Nexmark Example shows a tutorial how to run an example that is based on the Nexmark benchmark, including a data generator.
- Hands on Data Stream Processing shows different tutorials how Odysseus can be used in different projects - including special hardware
A. Hints if installation/start fails
- Java 11 has to be used. Although Java 11 was installed, it may happen that a different version is used. Therefore, check if Java 11 is used. Check also, if JAVA_HOME is set correctly.
- On windows, you can check the version by open the command line to tool (go on "start", and "run" and enter "cmd", then press OK. In the command line enter "java -version" and hit enter. You should see some lines beginning with "java version "1.11.XXXX". if command is not found or another version is shown, check your Java installation.
On MacOS, you may look at "B. Mac OS" in the next section.
- Be sure you downloaded the x86_64 version if you have a 64 bit operating system or the x86 version if you have a 32 bit operating system.
B. Mac OS
Warning: Odysseus Studio currently does not run properly (or at all) on MacOS. Nevertheless, you can run the pure server product on MacOS.
To run Odysseus from the pre-compiled packages available to download you have to do the following steps.
- Download and install Java 8 from Oracle (/usr/libexec/java_home -t BundledApp shut output a Java 8 version). You could, for example, use homebrew: https://www.lonecpluspluscoder.com/2017/10/08/installing-other-versions-of-the-java-jdk-via-homebrew/
- Download Odysseus from our homepage
- Open the terminal (e.g. with spotlight)
- Direct to the odysseus-folder, navigate to ../Contents/Eclipse/
- Run the following command:
java -XstartOnFirstThread -Xmx500M -Xms500M -Declipse.p2.mirrors=false -jar plugins/org.eclipse.equinox.launcher_1.4.0.v20161219-1356.jar --launcher.library org.eclipse.equinox.launcher_1.4.0.v20161219-1356 -console -nl en -debug -data @noDefault -showsplash de.uniol.inf.is.odysseus.rcp.base -Dorg.eclipse.swt.internal.carbon.smallFonts -clean
C. Installation under Linux
Odysseus should be installed for a single user. The user that starts the server process must have all rights to the installtion directory, else no new features can be installed and no features can be updated.
To run Odysseus you need a Java runtime environment in version 8.
sudo aptitude install default-jre
Download and unzip the Odysseus package to your local bin folder
mkdir –p ~/bin
wget –c http://odysseus.informatik.uni-oldenburg.de/download/products/monolithic/lastBuild/de.uniol.inf.is.odysseus.studio.product.monolithic-linux.gtk.x86_64.zip -O ~/bin/odysseus.zip
unzip odysseus.zip –d ~/bin
Add the Odysseus folder to your PATH variable
export PATH=~/bin/odysseus:$PATH
D. Running Odysseus Server on Raspberry Pi, Beagleboard Black Rev C
The Odysseus server component works on a Raspberry Pi. Simple install a recent raspian first.
You should use a distinct user for odysseus.
After that, you should update/upgrade the system and install JavaJRE:
sudo apt-get update
sudo apt-get upgrade
sudo apt-get install openjdk-7-jre
Tip: With the console-command raspi-config you can configure your RaspberryPi/BananiPi further (e.g. keyboard layout)
The following script will download and install Odysseus as a server-component
wget http://odysseus.offis.uni-oldenburg.de/download/products/server/lastBuild/odysseus.server.gtk.linux.x86.zip
unzip odysseus.server.gtk.linux.x86.zip
Alternatively, if multiple Odysseus-Instances should be connected (Peer-to-Peer-Network of RaspberryPi), you should download the Peer-Version of Odysseus:
wget http://odysseus.offis.uni-oldenburg.de/download/products/peer/lastBuild/odysseus.peer.gtk.linux.x86.zip
unzip odysseus.peer.gtk.linux.x86.zip
The following script will execute Odysseus (Server-Version) with respect to restarts due to possible future updates (downloadable: http://odysseus.informatik.uni-oldenburg.de/download/products/server/startOdysseusServer )
wget http://odysseus.informatik.uni-oldenburg.de/download/products/server/startOdysseusServer
chmod +x startOdysseusServer
#!/bin/bash

cd odysseus.server.gtk.linux.x86

while true; do
	java -Xmx500M -Xms500M -Declipse.p2.mirrors=false -jar plugins/org.eclipse.equinox.launcher_1.4.0.v20161219-1356.jar -console -debug -data @noDefault
	if [ "$?" != "23" ]; then
		break
	fi
done
Attention: If you downloaded and installed the Peer-Version of Odysseus, you have to replace "server" with "peer" in the 3rd line (or download it from http://odysseus.informatik.uni-oldenburg.de/download/products/peer/startOdysseus).
Attention: The script-file must be made executable with chmod +x startOdysseus
wget http://odysseus.informatik.uni-oldenburg.de/download/products/peer/startOdysseus
chmod +x startOdysseus
For the standard Beagle board "unzip" and "java" must be installed:
apt-get update
apt-get install unzip
apt-get install openjdk-7-jre
// If multiple java versions are installed: choose the jdk to use. Must be at least java 7
update-alternatives --config java
Start same as above the raspberry.
Further devices tested:
- Cubiboard use e.g. http://www.igorpecovnik.com/2013/12/24/cubietruck-debian-wheezy-sd-card-image/
- Cubiboard 3 (Cubietrack), Image use e.g. http://www.igorpecovnik.com/2013/12/24/cubietruck-debian-wheezy-sd-card-image/
- Banana Pi
For a "quick and dirty" way to start Odysseus automatically on startup, you have to edit the file /etc/inittab according to these instructions: http://elinux.org/RPi_Debian_Auto_Login
At the following to the end of the file .bashrc of the user (e.g., /home/pi/.bashrc)
cd
./startOdysseusServer
cd
./startOdysseus
Remark: For BeagleBone, autologin has to be activated like here described
http://embedded.von-kannen.net/2014/06/28/how-to-enable-autologin-debian/
Alternative:
Create a file odysseus in folder /etc/init.d/, give execute rights and replace DAEMON_PATH with your installation directoy, replace DAEMON with startOdysseusServer (startOdysseus in Peer)
/etc/init.d/odysseus start
/etc/init.d/odysseus stop
#!/bin/bash
# /etc/init.d/odysseus
### BEGIN INIT INFO
# Provides:   odysseus
# Required-Start: $local_fs $remote_fs
# Required-Stop:  $local_fs $remote_fs
# Should-Start:   $network
# Should-Stop:    $network
# Default-Start:  2 3 4 5
# Default-Stop:   0 1 6
# Short-Description:    Odysseus server
# Description:    Init script for the Odysseus
### END INIT INFO
NAME=odysseus
DESC="Odysseus data stream management system"
USERNAME=odysseus
PIDFILE=/var/run/$NAME.pid
SCRIPTNAME=/etc/init.d/$NAME
SCREENNAME=$NAME.screen
DAEMON=startOdysseus
DAEMON_PATH="/path/to/odysseus/"
ME=`whoami`
as_user() {
    if [ $ME == $USERNAME ] ; then
        bash -c "$1"
    else
        su $USERNAME -s /bin/bash -c "$1"
    fi
}
force_exit() {
    echo ""
    echo "SIGINIT CALLED - FORCE EXITING!"
    rm $PIDFILE
    ps aux | grep -e '$DAEMON_PATH/$DAEMON' | grep -v grep | awk '{print $2}' | xargs -i kill {}
    ps aux | grep -e '$SCREENNAME' | grep -v grep | awk '{print $2}' | xargs -i kill {}
    ps aux | grep -e '$SCRIPTNAME' | grep -v grep | awk '{print $2}' | xargs -i kill {}

    exit 1
}
do_command() {
    as_user "screen -p 0 -S $SCREENNAME -X eval 'stuff \"$1\"\015'"
}
do_start() {
    printf "%-50s" "Starting $NAME..."
    as_user "screen -c /dev/null -dmS $SCREENNAME $DAEMON_PATH/$DAEMON"
    as_user "screen -list | grep "\.$SCREENNAME" | cut -f1 -d'.' | tr -d -c 0-9 > $PIDFILE"
    PID=`cat $PIDFILE`
    if [ -z $PID ]; then
    printf "%s\n" "Fail"
    else
    printf "%s\n" "Ok"
    fi
}
do_stop() {
    printf "%-50s" "Stopping $NAME"
    if [ -f $PIDFILE ]; then
        do_command exit
        sleep 0.5
        as_user "rm $PIDFILE"
        printf "%s\n" "Ok"
        rm -f $PIDFILE
    else
    printf "%s\n" "pidfile not found"
    fi
}
do_status() {
    printf "%-50s" "Checking $NAME..."
    if [ -f $PIDFILE ]; then
    PID=`cat $PIDFILE`
    if [ -z "`ps axf | grep ${PID} | grep -v grep`" ]; then
        printf "%s\n" "Process dead but pidfile exists"
    else
        echo "Running"
    fi
    else
    printf "%s\n" "Service not running"
    fi
}
trap force_exit SIGINT
case "$1" in
  start)
    do_start
    ;;
  stop)
    do_stop
    ;;
  restart)
    do_stop
    do_start
    ;;
  status)
    do_status
    ;;
  command)
    if [ $# -gt 1 ]; then
      shift
      do_command "$*"
    else
      echo "Must specify command (try 'help'?)"
    fi
    ;;
  *)
  echo "Usage: $0 {start|stop|status|restart|command \"command\"}"
  exit 1
  ;;
esac
exit 0