This tutorial describes how to install a new feature in Odysseus.You may also have a look at How to update Odysseus.
A list of available features can be found at Features (or can be seen in a later step when the update site is loaded). However, in this tutorial we will install the optional database feature as an example.
There are three possibilities to install a new feature. The most easiest way is to use the GUI. If you don't have a GUI, e.g. when running a server-only product, you may install new features using the console.
There is a third version: Installing with command line.
Installing via GUI (Monolithic and Studio Version)
The installation process correlates to the update mechanism of Eclipse and works as follows:
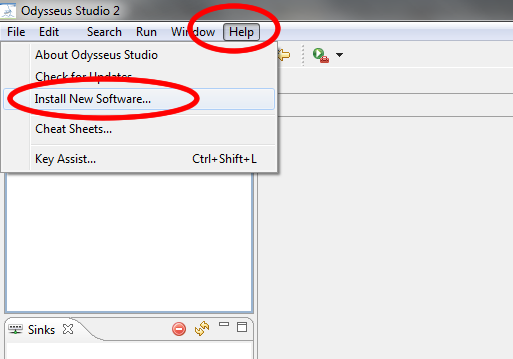
1. Open the install dialog
Open "Help" and then "Install New Software..." to open the install dialog
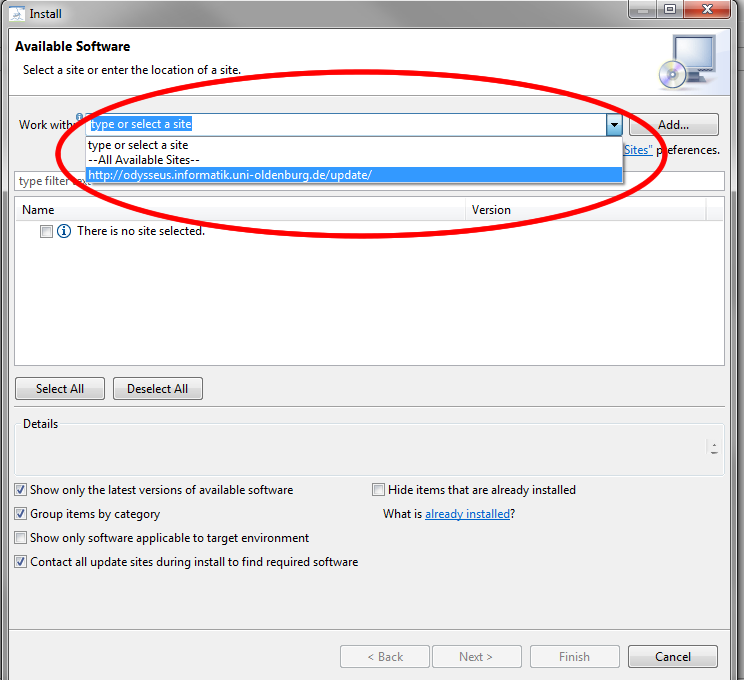
2. Choose the Odysseus update site
Choose the Update site from the "work with" dropdown.
Odysseus provides two common update sites:
- http://odysseus.informatik.uni-oldenburg.de/update/ This site contains stable versions of plugins
- http://odysseus.informatik.uni-oldenburg.de/incubation/ This site contains all plugins that are not always stable and may contain errors.
Remark: There is another update site, from one member of the Odysseus team: https://www.kuka.cc/software/odysseus/
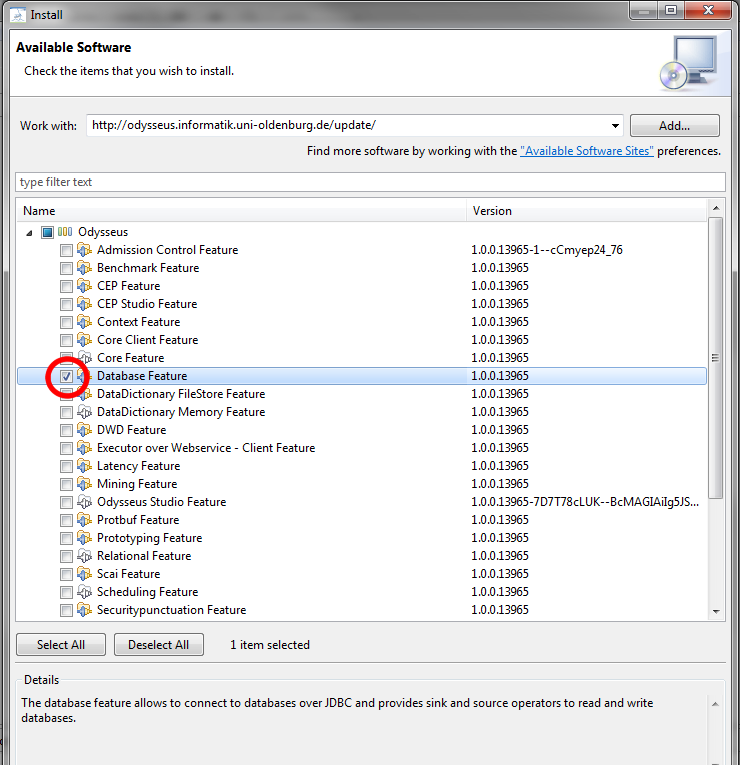
3. Choose the features
You should now see all available features. If you choose the options "Group items by category", the features are categorized into two groups: "Odysseus" and "Product Definitions". The first one holds all additional features that can be installed. So, at this point you should choose the features you want to install. In our example, we choose the "Database Feature". Press "Next".
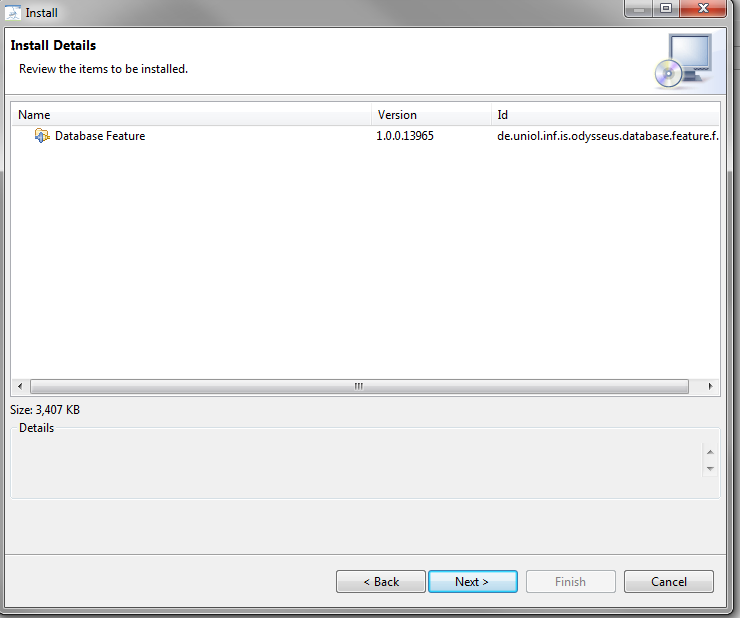
4. Check dependencies
Now, the installation should automatically check all dependencies. There are some features that depend on other features so that the install mechanism tries to resolve this by adding missing features. Finally, all needed features are listed. Press "Next".
5. Installation
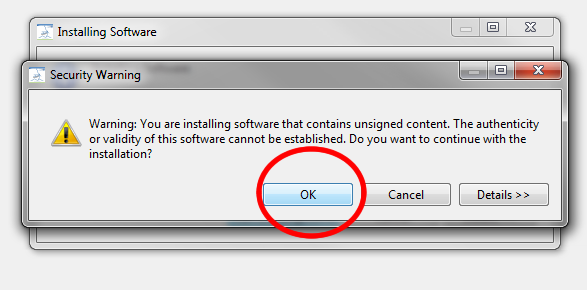
The installation process should now fetches all needed plugins and features from the update site and installs them. Since the features are not signed, you have to confirm the security warning.
6. Restart
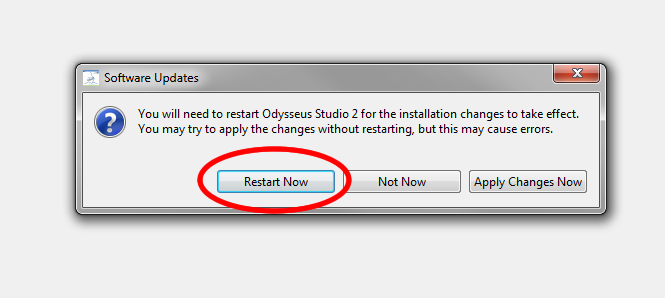
Finally, you have to restart Odysseus. You're done.
7. Check installation (optional)
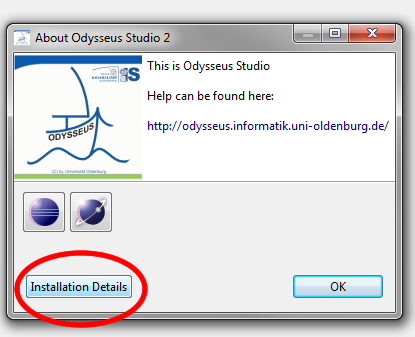
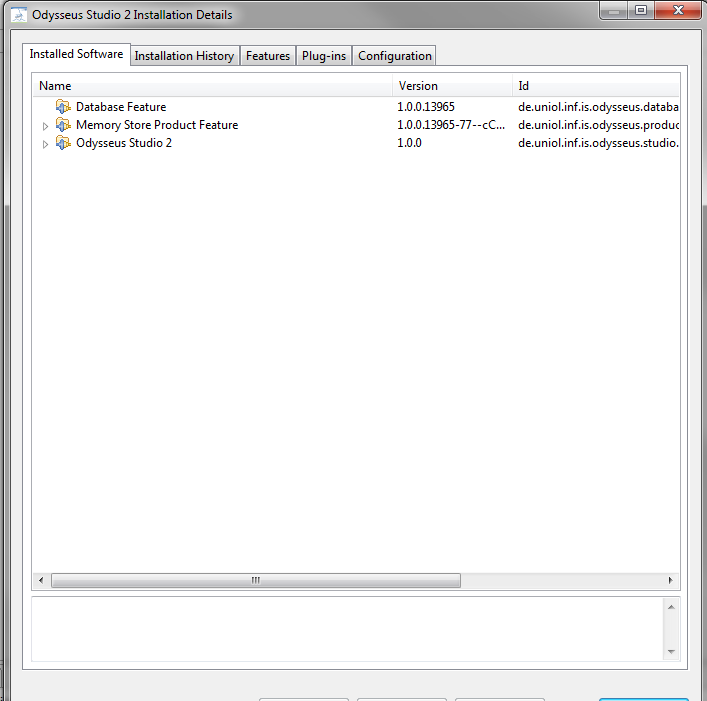
If you want to check the installation or if you want to know what features are already installed, you can open the "About Odysseus Studio 2" dialog from the "Help" and open "Installation Details".
You shold now see all installed featured
Installing via Console (Server version)
Remark: It is also possible to use Odysseus Script to install new features. (#REQUIRED)
If you don't have a GUI, you can install new features using the console.
There are different commands you may use.
Remark: If you want to install features, that are from the incubation part, you will need to change the update site:
setUpdateSite http://odysseus.informatik.uni-oldenburg.de/incubation/
List installed features
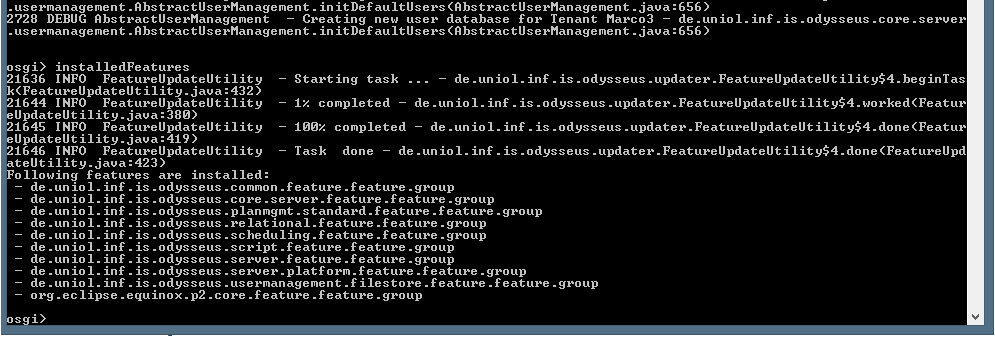
The command "installedFeatures" lists all features that are currently installed. Simply enter the command into the OSGi console like here:
List installable features
You may also ask which features can be installed for Odysseus. Keep in mind that you need an internet connection, so that the programm may fetch the data from the Odysseus update site.
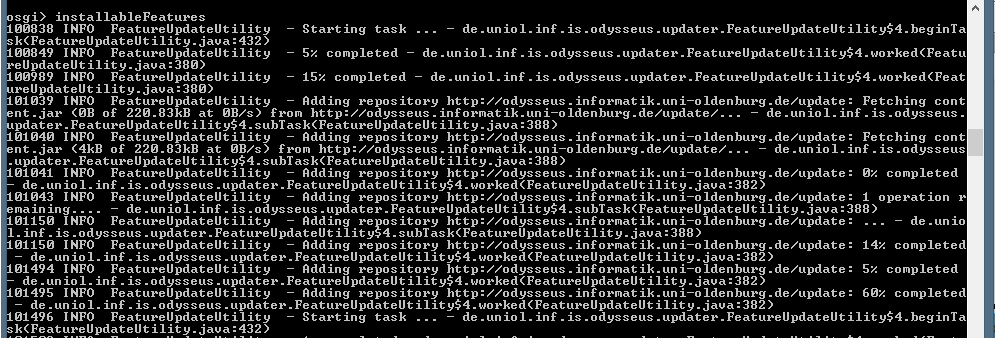
The command you may use is "installableFeatures", which looks as follows:
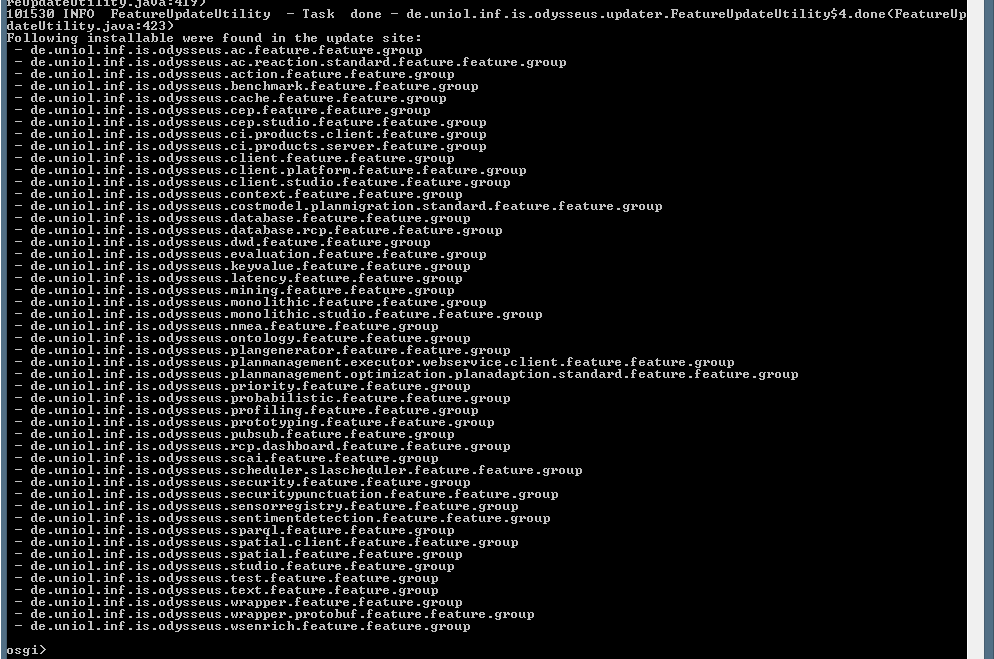
It will fetch some data from the update site and finally prints a list of installable features (already installed features are not shown).
The names of the features are the feature ids. Those ids can be used to install them.
Install a new feature
To install a new feature you may use the command "installFeature <feature id>". The feature id must be some of the (see above at "List installable features" to get a certain feature id).
Remember that you need a working internet connection.
After installation of the new feature(s), the system will be shut down and restarted automatically!!!
To install, for example, the database feature, you have to use it's feature id to install it, like in the following example:
The, the installation and update routine will automatically download, install and update all necessary features (aka plugins). After that, a restart is forced.
Tip: Because, every installation leads to a restart, you can combine different features with a comma (attention do not add a space!):
installFeature feature1,feature2,feature
I cannot install new features?
It can happen that it is not possible to install a feature on the server. The error may look similar to the following:
If this is the case, you have to update your existing features first with updateFeatures (see How to update Odysseus and then "Update via Console).
Update features
For updating existing features, you should look here: How to update Odysseus
Install Features via Command Line
It is possible to install features without starting the product (e.g. to create a docker image with a distinct combination of features), e.g. for Windows:
eclipsec.exe -application org.eclipse.equinox.p2.director -repository https://odysseus.informatik.uni-oldenburg.de/updatesite/odysseus_all_new/stable/origin/master/latest/ -installIU de.uniol.inf.is.odysseus.wrapper.rabbitmq.feature.feature.group -destination H:/git/odysseus_core/odysseus_dev/products/monolithic/target/products/de.uniol.inf.is.odysseus.studio.product.monolithic/win32/win32/x86_64 -profile SDKProfile
or for Linux:
/usr/lib/odysseus/odysseus -application org.eclipse.equinox.p2.director -repository https://odysseus.informatik.uni-oldenburg.de/updatesite/odysseus_all_new/incubation/origin/master/latest/ -repository https://odysseus.informatik.uni-oldenburg.de/updatesite/odysseus_all_new/stable/origin/master/latest/ -installIU de.uniol.inf.is.odysseus.wrapper.rabbitmq.feature.feature.group -destination /usr/lib/odysseus -profile OdysseusProfile
See: https://help.eclipse.org/2020-03/topic/org.eclipse.platform.doc.isv/guide/p2_director.html?resultof=%22%70%32%22%20%22%64%69%72%65%63%74%6f%72%22%20 for further information.
