...
Now you have installed the target platform, before you launch the product, we are going to add the OdysseusNet monolithic target to the normal monolithic target (see for a general tutorial Adding features to products) :
- Double click the de.uniol.inf.is.odysseus.monolithic.product.product under the directory de.uniol.inf.is.odysseus.monolithic.product.product in the Eclipse Project explorer
- Go the the Contents-Tab
- Add de.uniol.inf.is.odysseus.net.monolithic.feature to the list of features
- Save with CTRL+S
- Go to the Overview-Tab, synchronize and launch the eclipse application, this launches the Odysseus Studio (see Odysseus Studio)
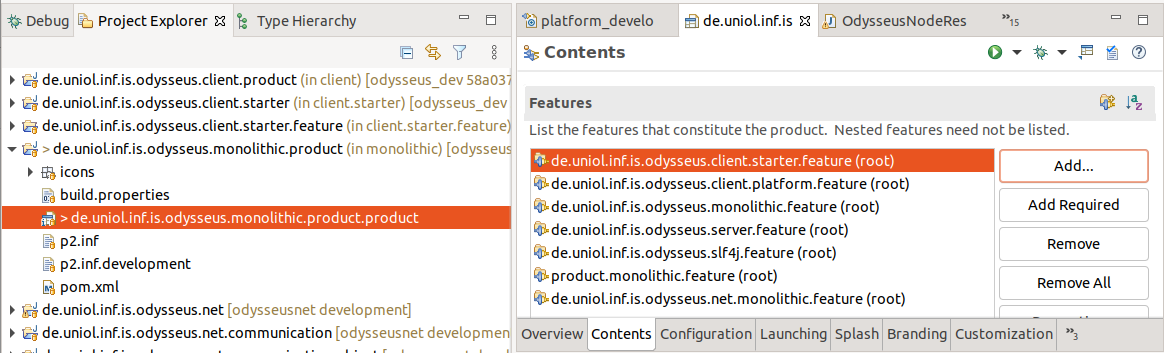
The OdysseusNet monolithic target also includes the OdysseusNet server target.
...
Setup of Odysseus worker nodes
Now we start Nexmark (a data stream simulation tool, see Getting Started with Nexmark) and Odysseus worker nodes with docker-compose, therefore create a docker-compose.yml in a directory (it will be named $CURRENT_DIRECTORY here for reference, in practice it could be e. g. the odysseusnet-repo) and with the following content (adopted from OdysseusNet Docker Compose Example):
| Code Block |
|---|
version: '3.3'

services:
    nexmark:
        image: odysseusol/nexmark
        ports:
           - 65440-65443:65440-65443
    worker01:
        image: odysseusol/odysseusnet
        stdin_open: true
        ports:
            - 18881:8888
        volumes:
            - ./worker01:/var/lib/odysseus

    worker02:
        image: odysseusol/odysseusnet
        stdin_open: true
        ports:
            - 18882:8888
        volumes:
            - ./worker02:/var/lib/odysseus

    worker03:
        image: odysseusol/odysseusnet
        stdin_open: true
        ports:
            - 18883:8888
        volumes:
- ./worker03:/var/lib/odysseus |
As a workaround make sure the worker01-03 directories have the 777-permissions with:
| Code Block |
|---|
sudo chmod 777 -R worker0* |
Otherwise the internal Odysseus worker node user cannot access the volume properly and fails.
| Note |
|---|
All configuration files will be placed under the $CURRENT_DIRECTORY, e. g. there are the following files: logs odysseus.conf odysseusNet.conf reloadlog.store scheduling.conf store |