...
The new project is shown in the project explorer (hint if you do not see the project explorer, use Window/Show View/Other ... and choose General/Project Explorer).
Step 4: Describe sources
The queries will access sources that deliver events. In our example we will connect to the already started nexmark server. In this examples we will use PQL to create the sources. For detailed information about source definitions see The Odysseus Access Operator Framework
There are different ways to created sources/queries in Odysseus. We will use the Odysseus Script way.
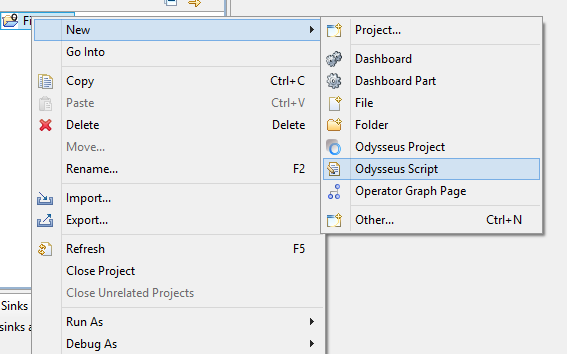
Right click on the new created project and choose New/Odysseus Script
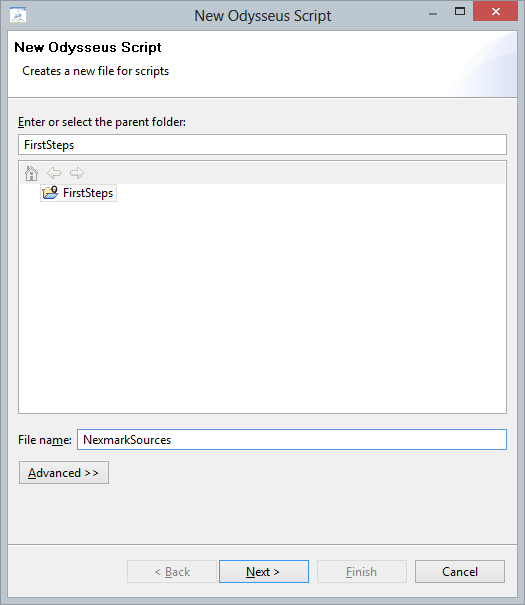
Give the script a name, e.g. NexmarkSources, and choose Next
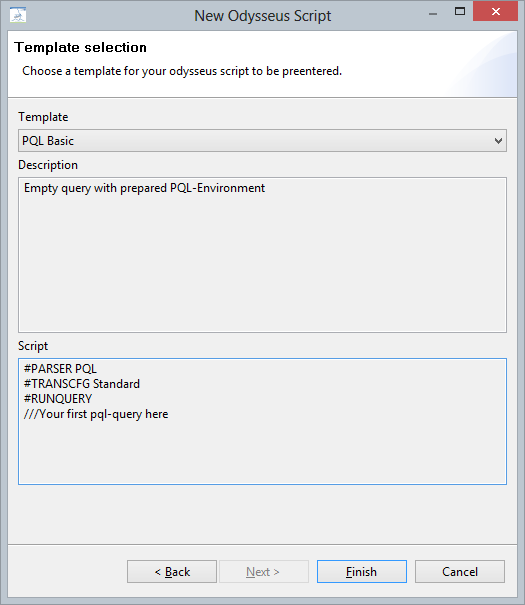
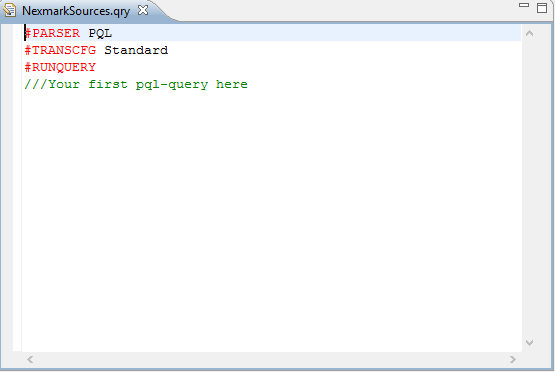
There a different templates that can be used: Choose PQL Basic, and click on Finish.
A new editor window will open as following:
Now we have to tell Odysseus, how to access the different sources (person, bid, auction and category).
Start with person by typing the following in to the new editor (below #RUNQUERY):
| Code Block |
|---|
nexmark:person ::= ACCESS({source='nexmark:person',
    wrapper='GenericPush',
    transport='TCPClient',
    protocol='SizeByteBuffer',
    dataHandler='Tuple',
    options=[
        ['host', 'localhost'],
        ['port', '65440'],
        ['ByteOrder', 'LittleEndian']
        ],
    schema=[
        ['timestamp', 'STARTTIMESTAMP'],
        ['id', 'INTEGER'],
        ['name', 'STRING'],
        ['email', 'STRING'],
        ['creditcard', 'STRING'],
        ['city', 'STRING'],
        ['state', 'STRING']
        ]
}) |
This statement describes a connection to the nexmark person server, delivered with Odysseus.
We create a new source with the name nexmark:person (and the type nexmark:person).
There are two types of parameters here. The first part is the physical connection to the server (We will not describe all parameters here (see The Odysseus Access Operator Framework for further information).If you have started the nexmark server on another machine change 'host' and if you started the person server on another port change 'port'.) and the seconds part describes the information this souces delivers.
The most important part is the schema description. Here (somehow similar to a create table statement in SQL) the names and the types of the attributes are defined.
There are different build in datatypes available in Odysseus (see The Odysseus Access Operator Framework for further information). If the sources provides application time (as the nexmark server does), the datatype STARTTIMESTAMP can be used to state that a LONG value should be used as timestamp for this event.
Now save the editor input (e.g. with CTRL-S) and run the query by using Execute Script (e.g. by right clicking on the file in the project explorer, on the editor it self or by using the button  in the toolbar)